

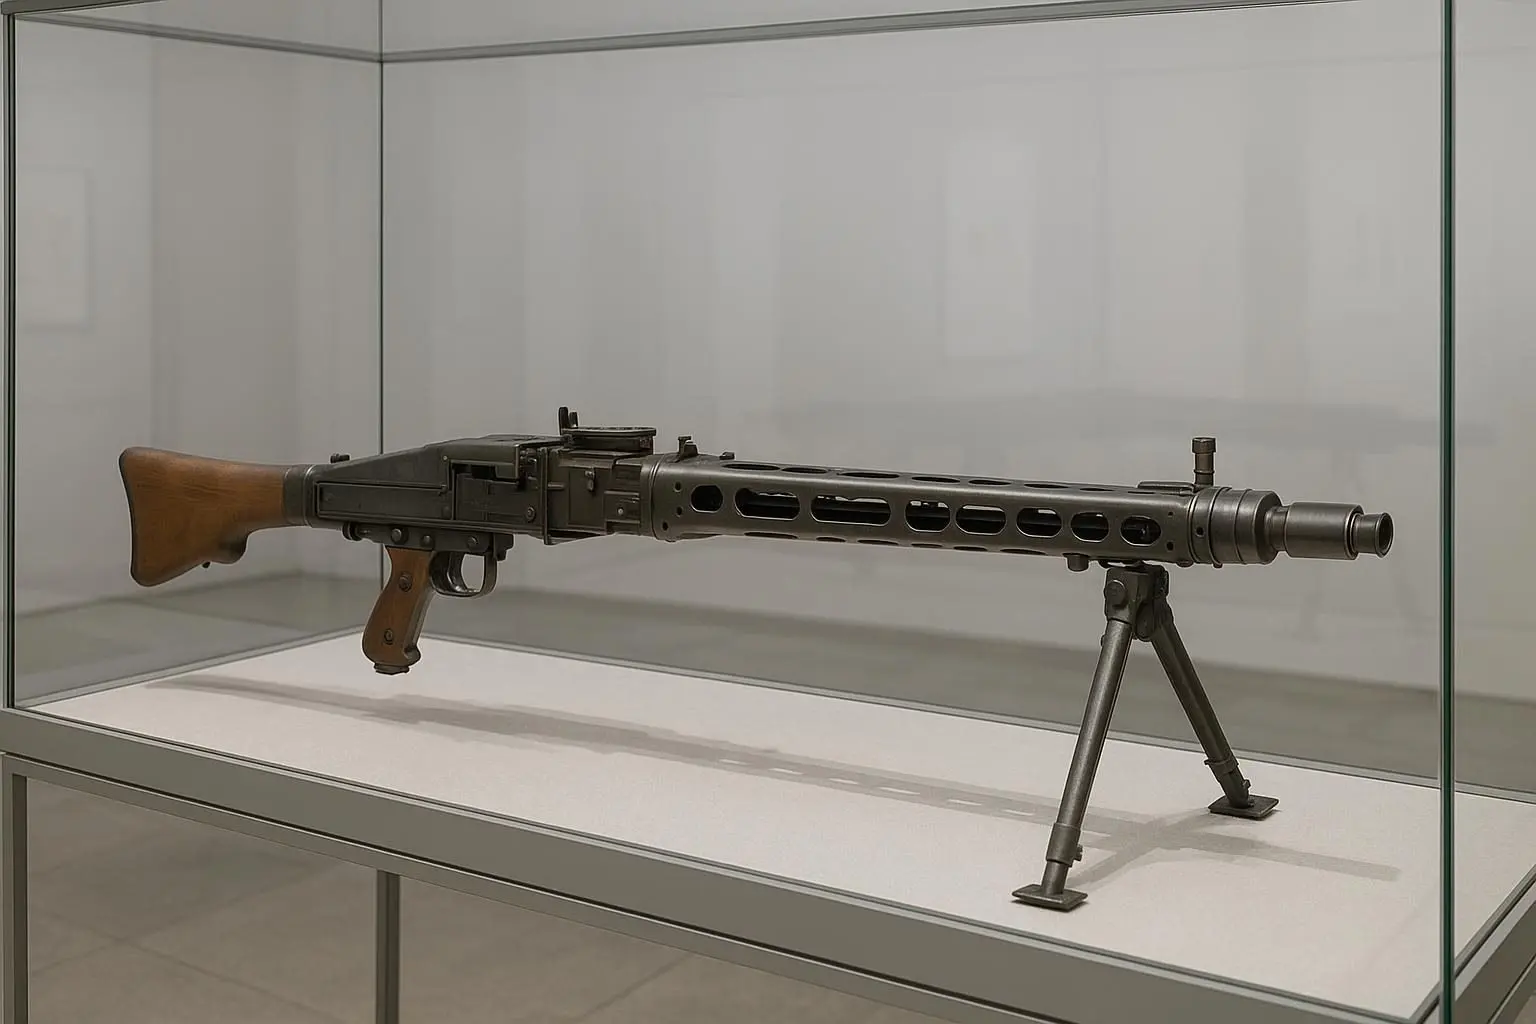
Capturing the Meaning of the MG 42: Ideas from Its Main Parts
Taking pictures of items in museums gives a lot of knowledge but many people don't notice the label on the object. Before you start taking photos take some time to read the label. It has details about the object-whether it is from a war time a postwar period or a rebuilt version. These differences are important because they show what the photos can correctly show.
The MG 42 is an example of this; the small differences in how it is made tell a complex story about design ideas, how it was used during the war and how it was made. As you get ready to take pictures of this machine gun look at the stamped receiver the quick-change barrel and the folding bipod. Each part is not a working part but also tells a story showing different parts of its time in action.
Knowing the Receiver: A Look at Industrial Efficiency
Looking at the receiver of the MG 42 shows a view into how Germany tried to make a machine gun. The receivers wide surfaces, easy to reach panels and the points where parts fit together tell a story compared to the solid parts of older guns.
Start by taking a picture of the thing, including the base and the case it's in. This helps give a picture and makes sure the close-up pictures don't show the object wrong. A close-up of the metal used can show parts of how it was made but make sure to check the label for what version is being shown. As you take the pictures think about where you're standing: changing your angle a little can help avoid shiny spots or other things you don't want in the picture without needing a lot of work later.
Revealing the Cover: The Center of How It Works
Next look at the cover and the way the MG 42 feeds its bullets. This part shows how the gun was made around linked bullets and a belt that keeps feeding them, not a box of bullets. Take a picture of the cover as part of the object before looking closely at the feeding path and the parts around it. Never touch or change the gun; always follow the museums rules for handling things.
In your close-up pictures try to answer some questions: What parts can you see? Are there signs of wear or repair? Is the bullets real or just a fake? A lens that is 50mm works letting you get close without being too close to the case so you don't get the problems of a very wide angle.
Looking at the Barrel: The Link Between Design and Use
The quick-change barrel on the MG 42 is a part that shows how the design was used in real combat. It helps with keeping cool when firing a lot. It shows a story from the receiver to the end of the barrel. Take pictures of how the barrel's attached to the receiver and then take even closer pictures of parts like the barrel cover or how it locks in place if allowed.
When you take pictures of the barrel think about where you're standing. Keeping your camera level helps show the shape while an angle can show more texture and depth. Be careful with the museums lights; bright lights can hide details like holes or curves. Change your angle of making the picture too contrasty in editing to keep the original look.
The Bipod: Showing the Story of Being Easy to Carry
The folding bipod shows that the design moved from being an industrial product to being used in real fighting. It shows how the MG 42 was used by soldiers who needed to move. Here the way the bipod is-folded or open-can mean things. Taking a picture of this part shows if the display is showing how it was moved, used to fire or just how the museum chose to show it.
Focus on taking pictures that show how the bipod connects to the receiver while keeping the barrel clearly in the picture. Leave space around the object so it doesn't look like its in the middle of a battle. This helps keep the meaning of what you're taking pictures of, not making it seem more exciting than it is.
Telling the Difference Between Old War Stories and Later Changes
The story of the MG 42 goes beyond when it was first used. Its effect can be seen in models like the MG3, which might have different parts and ways of being made. If the museum allows, take pictures of the label with the maker, the date and where it came from to help explain. Make sure the words are clear and not shiny for records.
Be careful not to guess or fill in missing parts from what you remember or from sources that may not be right. The pictures you take should show the truth of the display keeping the real look of the parts. Keep the files, including the information about them to make sure the records are correct.
Final Thoughts: A Way to Take Pictures in Museums
When you finish taking pictures make a final set: the whole scene, the details of the receiver and how the barrel and bipod connect. This full way helps make sure you don't build a story from one interesting part. Write down what the weather was like and any guesses you made that might need checking
Always follow the rules for taking pictures in the museum. Don't touch the display. Ask before taking pictures of people. Rules can be different, in places so always check the latest rules before sharing your pictures.
In the end the best way to show the MG 42 might be a few pictures that together tell the story of this machine-a tool that shows how factories worked what happened in battle and how it lasted over time.